Reset Batch
Reset Batch allows you to select transaction from the batch to reset back to a Status of '200' Staged for Settlement. Transactions will be submitted to the processor again during the next scheduled settlement submission.
Example
Examples of when to use Reset Batch include:
-
When specific transactions have erred in XiPay and funding has not occurred. You can use the following procedure to resubmit them to the processor.
-
The batch is complete in XiPay but the processor failed to receive the batch. You can use the following procedure to resubmit them to the processor.
Procedure
-
Go to Reports > Batches. This page may be blue or tan (pulling from the OLTP DB or RTP DB) depending upon how you navigated it. If you navigated to it from a live mode (blue) then it will be in live mode. If you navigated to it from a reporting mode page (tan) then it will be in reporting mode.
-
You must be in live mode to Edit a transaction. Only transactions in Authorized status can be edited.
-
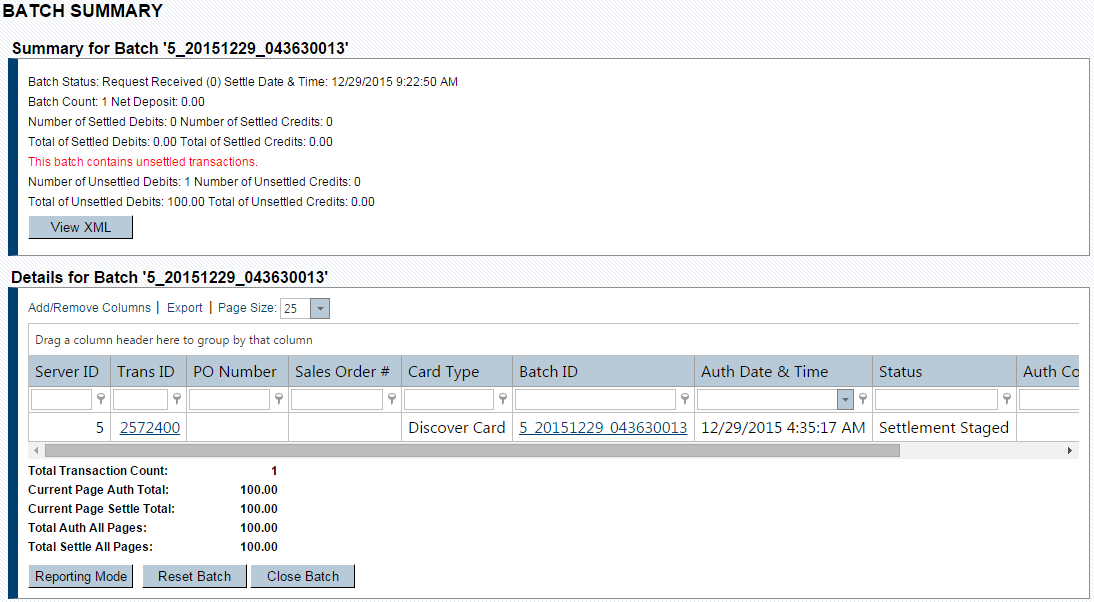
Click the desired Batch ID to access the Batch Summary page. (Note that if you are in the reporting mode the Live Mode button must be clicked before the Reset Batch button is displayed.)
-
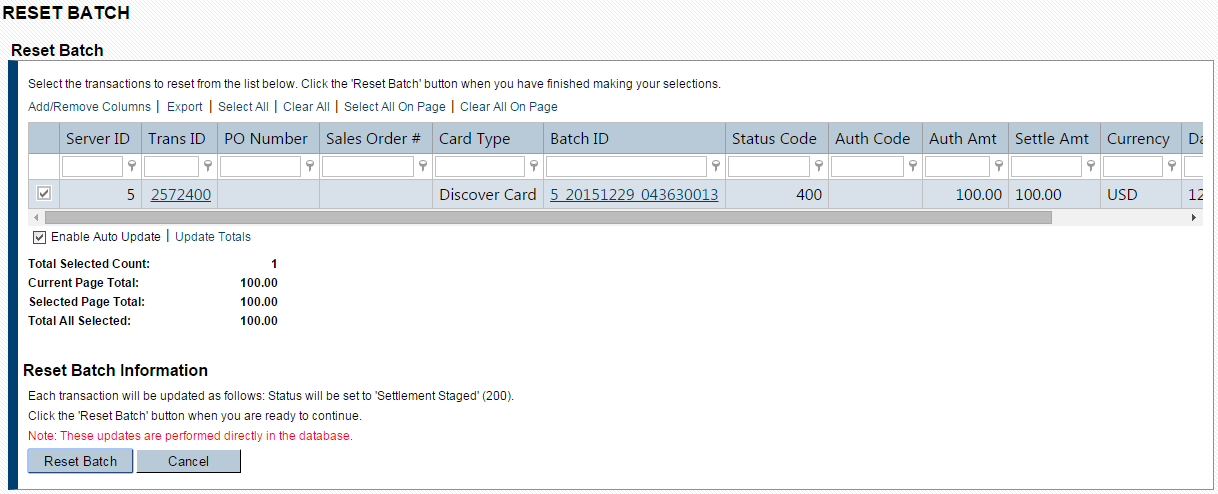
Scroll down to the bottom of page, and then click Reset Batch. The Reset Batch page displays with a list of available transactions.
-
All transaction in the batch are selected by default. First Sort by the Status column. This will group together any transactions in an Error or Failed status.
-
Go through each page of transactions and use the following selection options to either select or deselect transactions as needed.
-
Select All – Selects all of the transactions in the entire batch. All transaction are selected by default.
-
Clear All – Deselects all of the transactions in the entire batch.
-
Select All On Page – Selects only the transactions on the current page. If for example all transactions on the current page are in Error or Failed status, you can use this option.
-
Clear All On Page – Deselects only the transactions on the current page. If for example there are only two transactions in Error or Failed status on the current page, you can first deselect all and then just select the two transactions.
-
-
Click Live Mode, and then click Reset Batch. For tips on changing the column layout, see Add/Remove Columns, Reorder, Sort & Group Columns, or Filter Columns.

-
A confirmation dialog displays asking if you want to reset the batch and transactions you have selected.

-
Click OK to proceed.
-
The page displays all of the transactions that you have selected.
Review the transactions to verify you have selected the correct ones. If you have mistakenly selected any transactions, deselect them now. -
Under Reset Batch Details, click the Reset Batch button again. Another confirmation message displays asking if you are absolutely sure you want to reset the batch and transactions you have selected. If yes, click OK to proceed.

-
Once the processing request is complete, you are returned to the Batch Summary page.
DO NOT click the Close Batch button as this will halt your reset submission and your transactions will not fund.
-
Notice the batch status has changed to ‘Settlement Staged’; depending on your chosen payment processor, it may take up to an hour for your batch to move to the ‘Submitted’ status.