Navigation Features
Although the functions available to you as an XiPay WebGUI user may vary depending on your organization's configuration, there are many page elements (buttons, hyperlinks, data entry fields) that are common throughout Virtual Terminal. These common page elements allow you to navigate quickly and easily through the system.
Navigation Menu
The XiPay WebGUI navigation menu options are described in the following table.
| Menu Option | Definition |
|---|---|
|
Home |
Click the Home link at any time to return to the Home (Summary) Page. |
|
Operations |
The Operations Menu is a high-level list of the functions available to you in XiPay. They allow you to manually enter credit card and cardholder information for credit authorizations, credits, and verbal authorizations. Additionally, you can manually cancel any authorized transaction not yet staged for settlement, and settle authorized transactions. Also, there are extended processing options within some of the Operations. |
|
Reports |
Reports provide different views of the transaction information on multiple levels, from every transaction processed in the server environment down to the product information specific to a single transaction. This section provides the user with detailed and controllable information for analysis and monitoring. |
|
Help |
Contains the Your Information, Email support request, and About Paymetric sections and links to this Online Help. |
|
Logout |
Click the Logout link to leave your active Virtual Terminal session to protect any confidential data that might be displayed on your screen. Remember that to completely logout, close the browser window. |
Search Functions
Search includes quick search and advanced search.
Quick Search
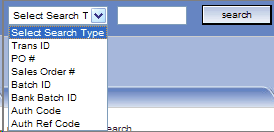
Use Quick Search to locate transactions by transaction ID, purchase order number, or any of a number of other search types. Select the search type, enter search text, and then click Search.

On the Search Results page you can sort the data by clicking on the column headings, drill down into any hyperlinked batch or transaction ID number, and/or export the report to an Excel spreadsheet.
Quick Search pulls from the Reporting Database so any transactions/batches submitted within the timeframe defined in the New Live Transactions/Batches – Last XX Minutes report will not be included; you must view that report for recently submitted items.
Advanced Search
The Advanced Search page provides additional search criteria you can use to find the information you need.
Advanced Search pulls from the Reporting Database so any transactions/batches submitted within the timeframe defined in the New Live Transactions/Batches - Last XX Minutes report will not be included. You must view that report for recently submitted items.
Server List Filtering
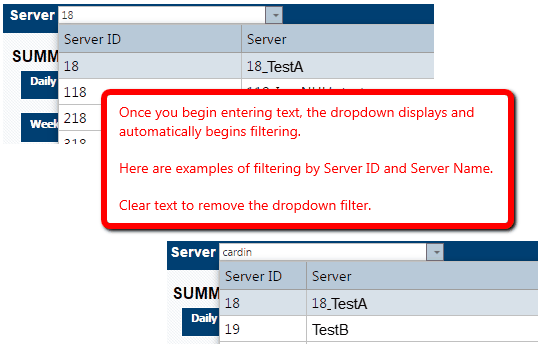
You can filter the Server drop-down list to limit the number of items. This is especially useful if you have numerous payment configurations (also referred to as Server IDs or XIIDs).
When you filter by Server ID, the filter remains active for the entire XiPay WebGUI browser session. However, if you log out of XiPay WebGUI or close your browser window, or if your session times out due to inactivity, you will have to activate the filter again.

How to Filter the List of Servers
-
In the Filter text box, enter the first 3-4 characters of the server ID or server description.
-
The drop-down box displays and automatically beings filtering.
-
To remove the filter, delete the text from the Filter text box.
Add or Remove Columns
You have the ability to add or remove columns to or from various lists and reports through-out the XiPay WebGUI.
-
Click on the Add/Remove Columns option at the top of the list.
-
Click on the field name that you want to add, and then drag it to the desired location in the grid.
-
To remove columns from the grid, drag them from the grid to the Field Chooser pop-up.

Column Layout and Sorting
The layout settings are remembered for up to 90-days. If you go longer than 90-days between logins, the default settings are applied.
Reorder Columns
You can reorder the columns in the various reports and data displays by clicking on a column heading and dragging it to the desired location. You can also sort by various columns by double-clicking on a column heading.

Sort Columns
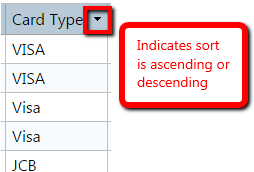
Click on a Column Title to sort by that column. An arrow indicates the sort order.

Group Columns
Drag column headings to the top of the grid to group by that data.

Reports and Lists Filtering
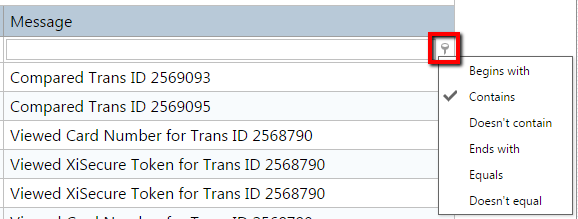
On all reports and pages containing lists of transactions or batches, you can filter on any column. The following example is from the Audit Log report.
-
On the desired column, click the Filter icon to choose the filter type. For example, from the Audit Log choose 'Contains' as the filter type for the Message column.

-
Enter the filter criteria in the filer text field for Message and the filter begins. In the example below 'token' was entered.

-
Clear the text field to remove the filter.
Note that you can apply multiple filters. The filters are cascading. For example, in the Audit Log, you could filter on the Login and then the word Token in the message to further limit the results.
Switch Between Reporting and Live Mode
To edit transactions or reset or close batches, you must be in live mode (which is indicated by a blue background). On pages where actions are possible, a Live Mode or Reporting Mode button is available.
Click the button to switch to the other mode.


User Session Control - Logging Off
To fully end the XiPay WebGUI session, the browser window must be closed.
After a 20-minute period of inactivity within a XiPay WebGUI session, you are automatically redirected to the LOGOUT page. From here, you are instructed to either close the browser window to end the session and completely log off or you have the option to return to the session. Returning to the session takes you back to the Summary Home Page.
Remember the purpose of this prompt is notify you that a session is still open after an extended period of inactivity, but to be completely logged-out requires action on your part by closing the browser window.