Capture a Transaction
You can Capture any transaction that has reached a status of Authorised. You can capture all or part of the original authorised amount. If you capture only a part of the authorised amount, you will not be able to capture the remaining amount.
 |
Your capture delay is set to zero (0) by default. This means payments are Captured automatically, usually 5-20 minutes after they are Authorised.
How often you see the Capture Transaction button depends on your Capture Delay setting. For more information about Capture Delay, click here.
|
To capture a transaction:
1. Search for the transaction that you want to capture.
2. Click on it in the transaction list. If the Current Status of this transaction is Authorised, the Capture Transaction button appears at the top-right of the page.
3. Click the Capture Transaction button to show the CAPTURE TRANSACTION window:
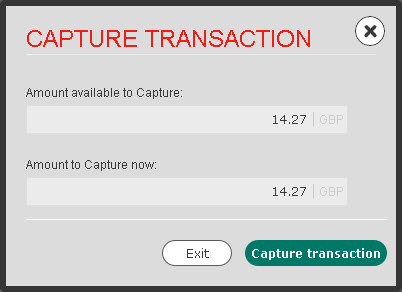
The Amount available to Capture is the minus any amounts that may have already been captured on this transaction.
4. Enter the amount you wish to capture in the Amount to Capture now box. You do not have to enter the full Amount available to Capture, but if you enter less than the original authorised amount, you will not be able to capture the remaining amount later.
5. If you are sure that you want to capture the amount entered for this transaction, click Capture Transaction. If you do not want to capture this transaction, click Exit.
This transaction status will now change to Captured in the transaction list. You can view the captured amount in the Transaction History.
