Report Controls
The following table provides information on the location and use of controls within most reports.
|
Control/Link |
Location |
Definition |
|
Functional Navigation Bar |
Below top navigation bar - changes based upon selected suite of reports. |
Provides an alternate method of navigation to reports and tools within a suite of reports. |
|
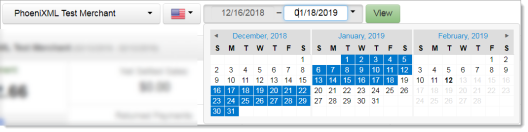
Date Range Selector (below)
|
Top half of reports |
Allows you to enter or select a date range from the calendar For many reports, you can enter a start date that begins on the first date your organization began using iQ reporting, however reports and tools differ in their data availability and maximum search range. When choosing a date range for exporting transaction-level reports (as described in Exporting a Report), and for the Dispute Inbox, data is available for the previous 24 months only. |
|
|
||
|
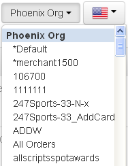
Reporting Group Selector
|
To the right of the Date Range selector |
Allows you to select the Reporting Group for the report. This selection changes the focus of the report summary panel and the top level of the hierarchy shown in the By Reporting Group tab of the granular data frame. If your organization comprises numerous reporting groups, type a few letters in the field to quickly search for the desired reporting group (type-ahead). After selecting a group, click the View button to refresh the screen. Note: Lengthy Reporting Group names are truncated. Note: If you do not see the desired Report Group when using the Reporting Group selector, and you have more than 100 report groups in your organization, your merchant identifier (MID) number may appear as a single selection for all report groups over the limit. |
|
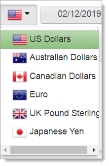
Currency Selector
|
To the right of the Reporting Group Selector or the Date Range Selector (depending on the report) |
Allows you to select the currency units for certain fields in the report. The Currency selector appears only if your organization handles multiple Settlement currencies. |
|
View Button
|
To the right of the Currency Selector |
Allows you to change/refresh the displayed data based upon new settings for the date range, Reporting Group, and/or Currency. Note: The view button and certain other controls change color based on the color scheme associated with the suite of reports. For example, Financial reports have a green color scheme, whereas Recovery reports follow a blue color scheme. |
|
Export CSV Data
|
Within various reports, or at upper right of summary data panel. |
Allows you to export the current report data to a csv (comma separated values) format file. See Exporting Transaction-Level Data for more information. |
|
Export Excel Data
|
Upper right of summary data panel, or within a report. |
Allows you to export the current report data to Microsoft Excel or save in csv (comma separated values) format. See Exporting a Report for more information. |
|
Export PDF
|
Upper right of summary data panel |
Allows you to create a PDF of the report you are viewing, which you can save to your local system. See Creating a PDF Report for more information. |
|
Settings
|
Upper right of report detail or results table |
Allows you to add, remove, and re-order columns in certain reports (Dispute Inbox, Session Activity, Transaction Search results, Chargeback Search results, etc.). See below. |

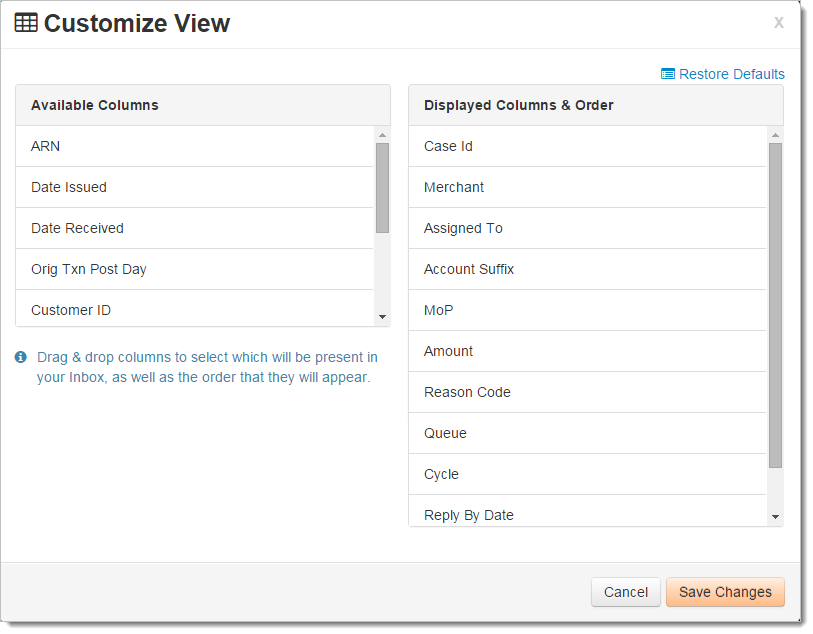
Customizing Your Report View
In certain reports and search results screens (including the Dispute Inbox, Session Activity, Transaction Search and Chargeback Search), you can customize the view of the data table.
To add, remove, or re-order columns in a report or in search results:
-
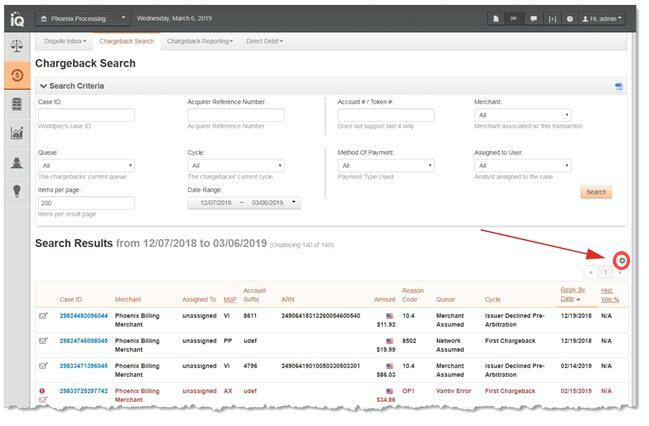
Click the Settings icon (
 ) above the table in the applicable report. Settings Icon (for Chargeback Search Results) shows the location of the settings icon when viewing Chargeback Search results.
 Drag and drop the desired column(s) from the list of Available Columns to the list of Displayed Columns to add columns, or vice versa to remove columns.
Drag and drop to re-order the Displayed Columns as necessary.
Click Restore Defaults to return to the default table set up if necessary.
Click Save Changes.
The Customize View dialog box appears (Customize View Dialog Box (for Dispute Inbox)
). The currently Displayed Columns appear on the right side of the dialog box in the order in which they appear, and the Available Columns appear on the left side. Note that the example dialog box shown is for the Dispute Inbox. Columns will vary, depending on what report or search results you are viewing.
Settings Icon (for Chargeback Search Results)
Customize View Dialog Box (for Dispute Inbox)