Settle
Once you have completed all of the Settlement steps, you are returned to the Batch Summary page and will notice a "Close Batch" option. Do NOT select Close Batch. It should NOT be used in conjunction with Manual Settlements or the Reset Batch feature nor for obtaining funding. The purpose is to force closing of batches due to errors. This feature halts the settlement process and prevents funding from occurring for any staged transactions.
Search for Transactions
-
From the Operations menu, select Settle.

-
Select the checkbox next to each search field you want to use, and then enter the search text. Unchecked search fields are ignored by the system, even if they contain text.
-
Currency – The currency type. This is a required field.
-
Transaction ID – Number issued to identify a specific transaction.
-
Authorization Date – The date the transaction was authorized.
-
Status Code – List of authorized status codes you can select to filter the transactions.
-
Card Type – The type of card used for the transaction.
-
Exclude Credits – By selecting this checkbox, only debits will be shown.
-
-
Click Continue. The Settle Batch screen appears, listing all of the authorized transactions matching your search criteria. For tips on changing the column layout, see Add/Remove Columns, Reorder, Sort & Group Columns, or Filter Columns.

-
To edit the amount listed in the Settle Amount field, click the Edit option for the transaction you want to settle, and enter the new amount. The amount you enter cannot exceed the authorized amount and cannot include currency symbols.
-
Click the Trans ID hyperlink on any transaction to view billing information, shipping information, charge information, level II and level III information.
-
Click the Batch ID hyperlink on any transaction to view a summary of the batch and the included transactions.
The following table provides more information about the columns in the Settle Batch page.
Field Definition Server ID
The Server ID assigned to the transactions.
Transaction ID
Number issued by XiPay to identify a specific transaction.
Purchase Order Number
Purchase order number as given by merchant to reconcile the purchase request.
Sales Order Number
Sales document number as defined by merchant.
Batch ID
The identification number given by the merchant to reference a group of transactions.
Status
Most current status of the transaction in XiPay.
Authorization Date and Time
Date and time of the initial authorization request given by XiPay.
Authorization Code
Authorization code issued by the clearinghouse.
Authorization Amount
Total amount authorized.
Settle Amount
Settled total of the transaction, if it has been settled. This column is empty (left blank) for transactions that are not settled.
Currency
Displays the currency type.
-
Scroll down and click the checkbox next to the transaction(s) you want to settle.
Settle Transactions
The Settle Batch page lists all transactions that meet your specified parameters. Detailed information is listed to help the user identify and choose which transaction(s) will be submitted for settlement.
Line item information in the settlement form includes the Server ID, XiPay transaction ID, purchase order number, sales order number, a batch identification (only populated for previously submitted transactions), and the XiPay time of initial authorization, authorization code, authorized amount, settle amount, and currency type.
You can also settle transactions under a merchant-specified Batch ID number. The field where you may specify this number is located at the bottom of the Settle Confirm page. If a batch number is not specified, XiPay will generate a manual batch ID every time a group of transactions are settled through XiPay WebGUI.
A checkbox on the left of the table allows the user to mark which transaction(s) will be sent for settlement.
The following table lists and describes the functions that you can perform on the Settle Batch screen.
| Field | Definition |
|---|---|
|
Select All |
Selects all authorizations on all pages. |
|
Clear All |
Clears all transactions from all pages. |
|
Export |
Used to export the authorization data in a web-based Microsoft Excel Worksheet. |
|
Update Totals |
Select any number of authorized transactions and click on update totals to view the amount for those batches. |
|
Settle |
Submits the selected transactions for settlement. |
The Settle Batch page Totals table lists the page totals for the transactions in the Settle Batch screen.
| Field | Definition |
|---|---|
|
Current Page Total |
Total of settlement amounts for all transactions listed on the displayed page. |
|
Selected Page Total |
Displays the settlement amount totals for the displayed and selected transactions. |
|
Total All Selected |
Shows the total for all selected transactions from all screens. |
Settle Batches
-
Select the checkbox next to the transaction(s) you want to settle.
-
Click the Settle button. The following confirmation message is displayed.

To edit the amount listed in the Settle Amount field, double-click the amount listed for the transaction you want to settle, and enter the new amount. The amount you enter cannot exceed the authorized amount and cannot include currency symbols.
-
Click OK. The Settle Confirm - Transactions Selected for Settlement screen is displayed.
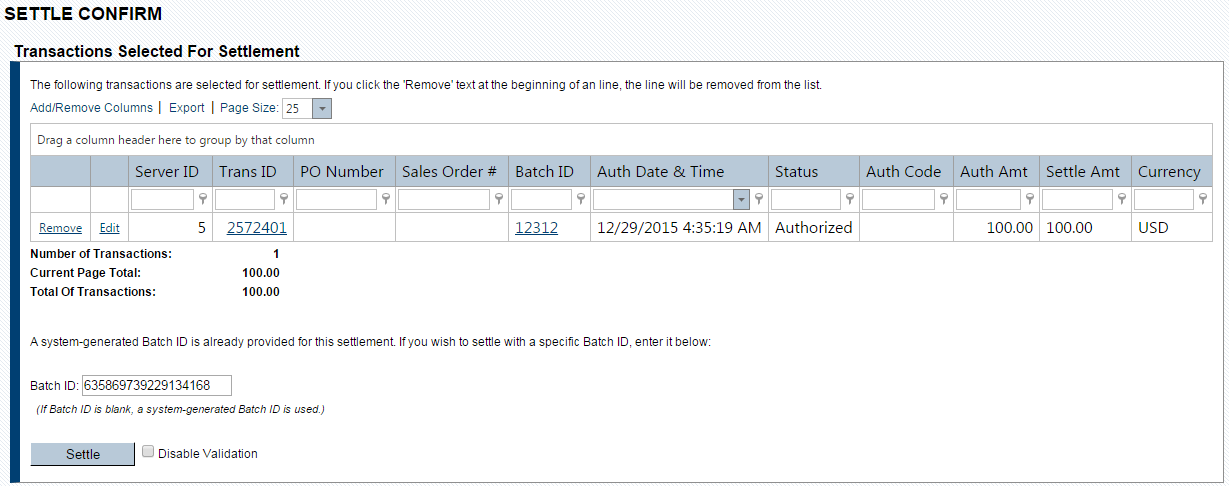
If you choose to alter the Batch ID, do not use special characters other than the _ (underline) or . (period). Any other special characters will cause batch processing to stop and delay funding.
-
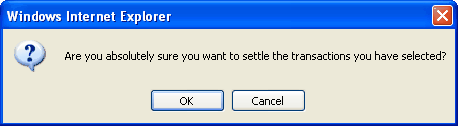
Click Settle. The following confirmation message is displayed.
-
Click OK to settle the batch. The Batch Summary page displays all details of the settlement including the batch number, number of transactions (and batches) settled, date, time, and other information.
IMPORTANT: On the Batch Summary page you will notice a "Close Batch" option. Do NOT select the option. It is meant to force a batch close due to problems and it will halt the settlement process and prevent funding from occurring for any staged transactions.Also included on the Batch Summary page is the Export option which you can use to send the batch summary to an Excel spreadsheet.