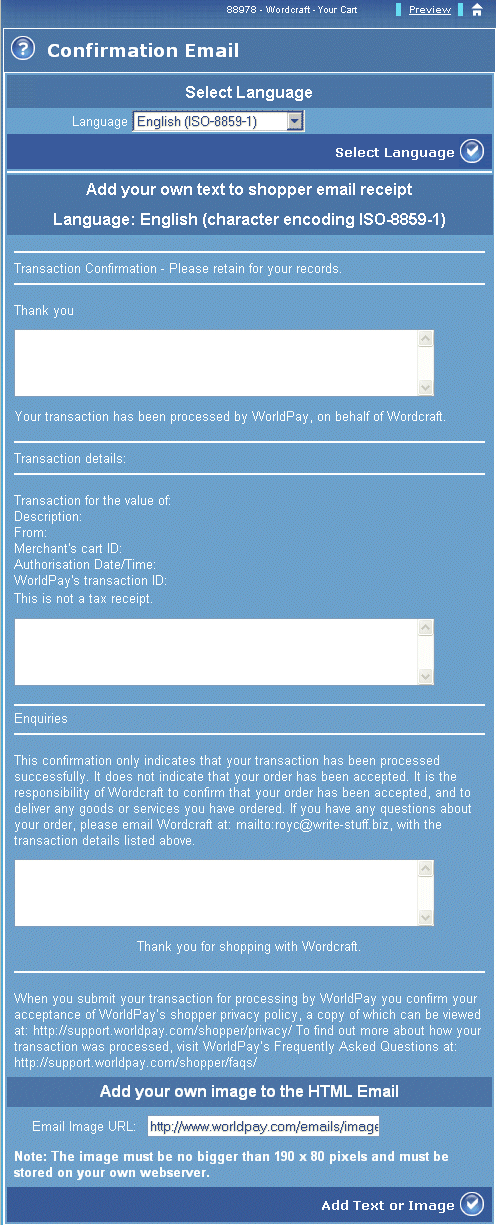
When a shopper makes a purchase from your store, our payment server sends them a Confirmation Email. The Confirmation Email page enables you to customise this email and to add your own text. Any text you enter will appear in the email sent to your shoppers.

Figure: The Confirmation Email page
The table below describes the fields displayed in the Confirmation Email page.
|
Label/field |
Description |
|
Select Language |
This area of the page only appears if you have enabled another language, using the Language page. |
|
Language listbox |
This listbox enables you to select a language to be used in the Confirmation Email. |
|
Select Language button |
Use this tick button to apply the language selected in the Language listbox. |
|
Add your own text to shopper email receipt |
The shopper Confirmation Email page offers three fields where you can enter text: they appear in areas at the top, middle and bottom sections of the email. These fields are shown within the text of the entire email message, so that you can view where your entered text will display in the email message sent to shoppers. There is no limit to the amount of text you can enter in the three text boxes, but we strongly recommend that you check the spelling of your entered text before adding it to the email. |
|
Add you own image to the HTML Email |
This section enables you to add an image to the Confirmation Email. The image will be displayed in the top right corner of the email. |
|
Email Image URL: |
Enter your server-based location for the image file into this field. Note that the image will be loaded into the email from your own webserver. Please ensure that this image is not larger than 190 pixels wide by 80 pixels tall. |
|
Add text or Image button |
Select this tick button to apply the changes you have made to the Confirmation Email. Note that the image may take up to two hours to appear on your new Confirmation email version, as this action requires an update on our secure server. |