![]()
Integrations with some types of shopping carts may affect the display of headers and footers in the Payment Service pages.
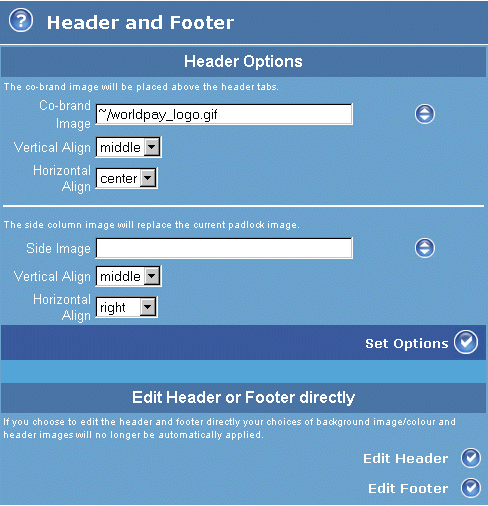
The Header and Footer page enables you to customise the header and footer used in the Payment Service pages.
To make simple changes to the default header we supply, such as adding and positioning an image, use the Header Options section of this page.
To create your own header and footer, enter your content by using the Edit Header or Footer directly options.
To view changes you have made to the Payment Service pages, select the Preview link (at the top right of the Payment Page editor).
|
|
Integrations with some types of shopping carts may affect the display of headers and footers in the Payment Service pages. |

Figure: The Header and Footer page
The table below describes the fields displayed in the Header and Footer page.
|
Label/field |
Description |
|
Header options |
To add and manipulate an image, you must have already added it to your Test installation using the File Management page. You can customise the following header images described below. Note that you will clear the entries in this section if you use the editing options in the Edit header or footer directly section below. To resume editing with the Header options, you need to delete the edited header.html and footer.html files from the Test installation, by using the editor's File Management feature. |
|
Co-brand image |
Specify the image displayed in the top right corner of the header area. Enter the name of the image file you want to use. You do not need to enter a path name - just the name of the image file. When you select the Set Options button to apply your image selection, a root path (~/) is added to the file name automatically. |
|
Vertical align |
Use this listbox to select the vertical alignment of the co-brand image. Select from top, bottom or middle. |
|
Horizontal align |
Use this listbox to select the horizontal alignment of the co-brand image. Select from left, right, or center. |
|
Side image |
Specify the side image, which replaces the standard padlock image ( |
|
Vertical align |
Use this listbox to select the vertical alignment of the side image. Select from top, bottom or middle. |
|
Horizontal align |
Use this listbox to select the horizontal alignment of the side image. Select from left, right, or center. |
|
Set options button |
Select this button to apply your settings to the Payment Page. |
|
Each of the options in this section enables you to enter your own HTML code for the header or footer. For more information about using these features, please refer to Editing the header and footer directly. Note that when you edit and save the HTML code for the header or footer files, the header/footer sections of the current properties files will be over-written. Also note that this editing will clear the entries in the Header Options section, described above. To resume editing with the Header Options, you need to delete the edited header.html and footer.html files from the Test installation, by using the editor's File Management feature. |
|
|
Edit header button |
This button opens an edit box where you can enter your own HTML code for the header. |
|
Edit footer button |
This button opens an edit box where you can enter your own HTML code for the footer. |