![]()
The image file size should not be greater than 500KB. If you select an image that is too large, in terms of dimensions as well as file size, an error message will be displayed. In this case, reduce the image size or use another image.
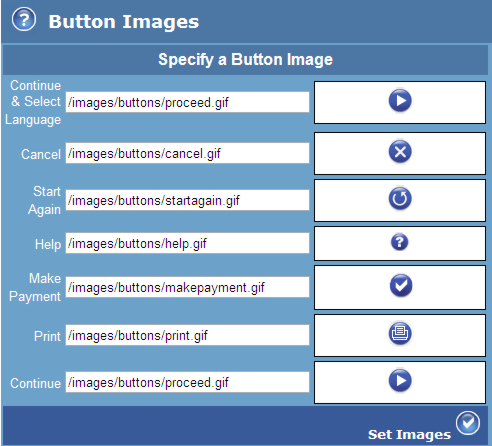
The Button Images page enables you to replace the button images in your payment service pages.
Before you can specify an image it must already be in your installation, you can use the file management page to upload images from your PC/network to your installation.
|
|
The image file size should not be greater than 500KB. If you select an image that is too large, in terms of dimensions as well as file size, an error message will be displayed. In this case, reduce the image size or use another image. |
To specify a button image:
1. Enter the name of the image in the field you want to update, such as the Cancel field if you want to replace the Cancel button image. You do not need to enter a path name - just the name of the image file.
2. Select the Set Images button to apply the changes to your Payment Page. The selected image will be displayed in the box on the right and will be added to your Payment Page, replacing the previous button.
To change the colour and size of the text used for the button labels, please refer to the Text Styles page.
To view how these elements are displayed on the Payment Page, please refer to Payment Page layout.

Figure: Button Images page
The table below describes the fields displayed in the Button Images page.
|
Button name |
Description |
|
Continue & Select Language |
The default button that is displayed for selecting a language or continuing to the next page. |
|
Cancel |
The Cancel button. |
|
Start Again |
The Start Again button. |
|
Help |
The Help button. |
|
Make Payment |
The Make Payment button. |
|
Set Images button |
Select this tick button to apply your settings to the Payment Page. The selected image will be displayed in the box on the right and it will be added to your Payment Page, replacing the previous button. When you select the Set Images button a root path (~/) is automatically added to the filename. |