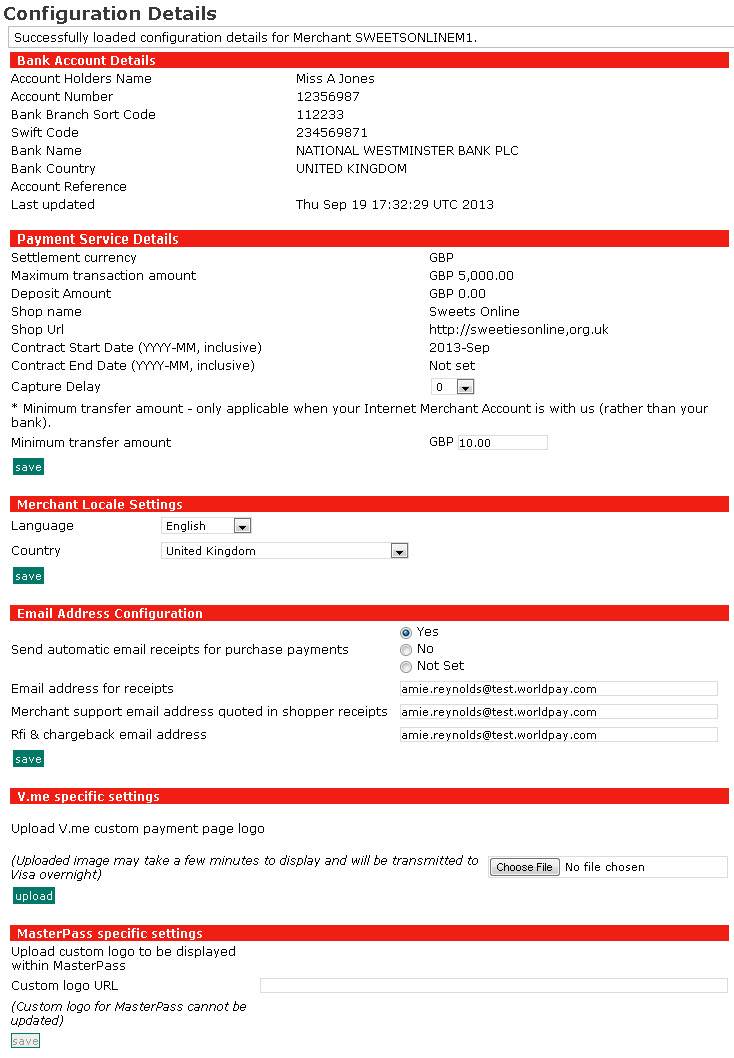
Use the Configuration Details page to view your bank details and set the options that allow you to administer your account on the Worldpay Business Manager.

|
Information in the Configuration Details page is displayed for one merchant code at a time. Any changes are applied to the chosen merchant code, displayed in the box at the top of the Worldpay Business Manager. If you have more than one merchant code you can change to another one using the box. |
The top section of the page displays your bank account details. If the details are not correct, you must inform WorldPay of any changes that need to be made by emailing: customeramendments@worldpay.com.
For new merchants, your capture delay is set to 0 (zero) by default. This means there is no delay and capture takes place immediately after the authorisation of a payment.
|
To learn more about capture delay, click here. |
You can change the default at any time on this page.
1. In the Payment Service Details area, click the Capture Delay drop-down and choose the option of your choice:
0 (zero) - no capture delay
1 - 14 days - sets a capture delay in the chosen number of days
Off - turns the capture delay off. This means that you must use the Capture button to capture every payment.
2. Click save.
 |
Financial institutions often have a time limit for the maximum delay between authorisation and capture processing. When setting a capture delay, it is generally wise to capture within 4 days of authorisation. |
This only applies to Business Gateway Plus merchants. If you set a value here, WorldPay will not transfer funds to you until the amount due to be transferred (for a given merchant account) matches the set value.
1. In the Payment Service Details area, click the box next to Minimum transfer amount.
2. Enter the minimum transfer amount (in the currency that we transfer funds to you).
3. Click save.
Currently, the Worldpay Business Manager only supports the English language. However, more languages will be available in a future release.
1. Select the default language and country settings. This sets the default language for the Merchant Administration Interface and emails sent to merchants.
2. Click save.
Email notifications let you view payment details in emails. You will receive an email notification for payments that are at the Authorised, Refused and Refund Started (or SENT_FOR_REFUND in reports) payment status. The email is sent to the email address entered in the Email address for receipts box.
1. Scroll down to Email Address Configuration.
2. Select the Yes radio button next to Send automatic email receipts for purchase payments.
3. Type the email address you want notifications to be sent to in the Email address for receipts box.
4. Type your support email address in the Merchant support email address quoted in shopper receipts box.
Your support email address will be included in your customer receipt emails, which are sent when a transaction gets the status of Authorised and Refund Started (which is SENT_FOR_REFUND in reports).
5. You can also set up email notifications for Request for Information (RFIs) and chargebacks. To do this, type an email address in the Rfi & chargeback email address box.
6. Click save.