Network Payment Token Service
There are settings in Merchant Portal called "Network Payment Token Service" that are required to enable and configure the Network Payment Credential Management Platform (CMP).
Configure Network Payment Token Service
-
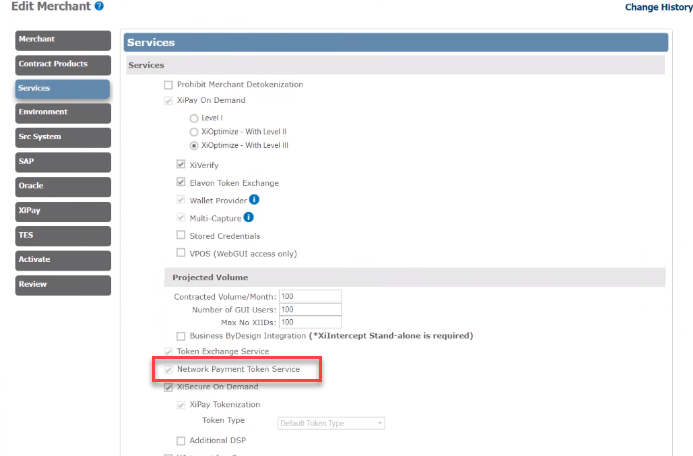
Edit the Merchant, and then go to Settings > Services.
-
Select the Network Payment Token Service checkbox. NPTS displays on the left navigation.
-
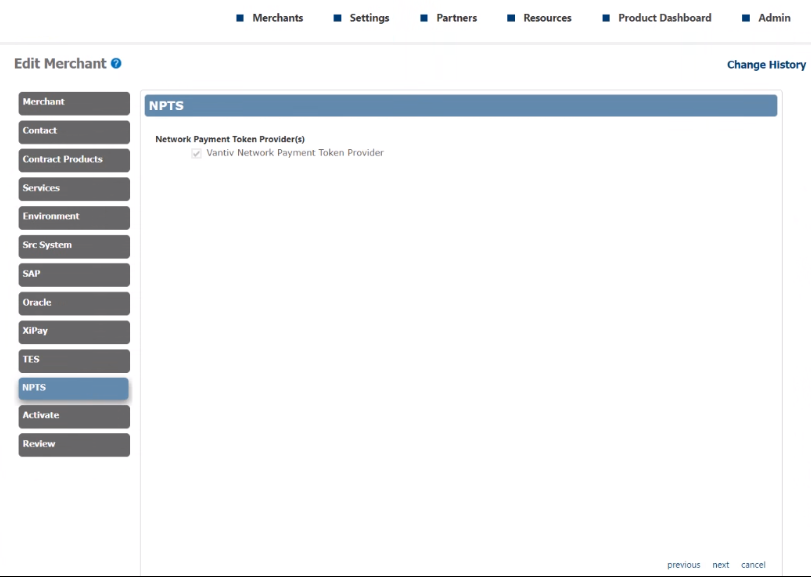
Select NPTS, and then select a Network Payment Token provider.
-
Click next, and then continue onboarding the request. After the Onboarding team enables the Service and Providers in the Merchant's profile, menu options display under the Settings menu to create users and configure Network Payment Token Service profiles.
-
You can also access the Network Payment Token Service from the Merchant Settings dashboard.

Configure NPT Users
Configure NPT users that Merchants will use to authenticate against the Network Payment Token API.
-
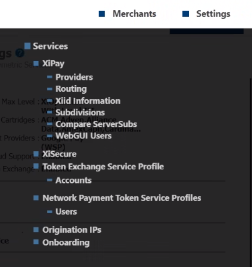
After it is enabled in the Merchant profile wizard, select the Network Payment Token Service section will appear under the Settings menu for the Merchant. You can also access the Network Payment Token Service from the Merchant Settings dashboard.
-
Select Users, and then click Add New User.

-
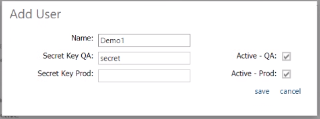
To add a user, do the following:
-
Enter a name.
-
Enter the secret keys for each environment (QA and Prod). If you do not enter a key, one will automatically be generated.
-
Select the permissions for each environment. Select Active to enable the user. To disable the user, clear the check box.
-
-
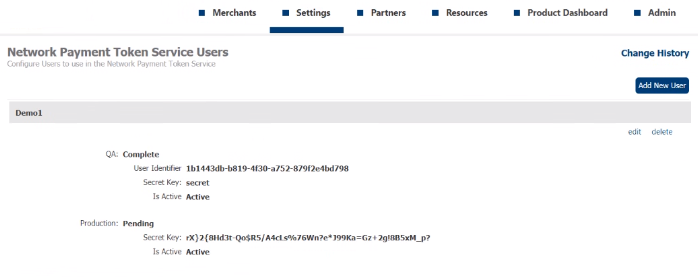
Click save. The user entry displays "Pending."
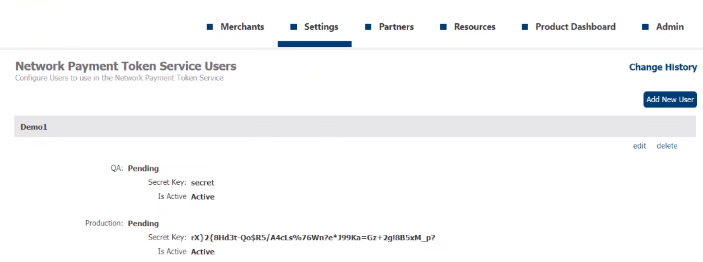
After the onboarding request is complete, the User Identifier displays. Use this value as part of the authentication/authorization when making a request call to the API.
Configure NPT Profiles
-
Select Network Payment Token Service Profiles under the Settings menu for the Merchant. You can also access this from the Merchant Settings dashboard.
-
To add a profile, click add. To edit an existing NPT profile, select the profile and click edit.

-
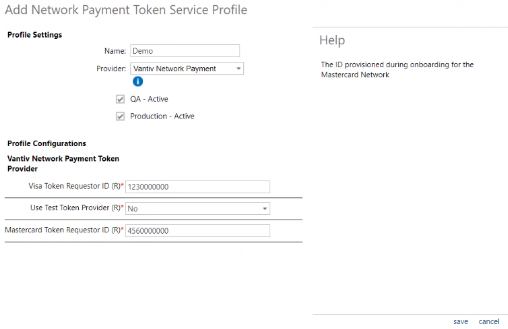
To configure a profile, do the following:
-
Enter a name.
-
Select a provider. Additional fields display to configure token provider specific values. When you click into a field, the Help section to the right displays a description.
-
Select the permissions for each environment (QA and Prod). Select Active to enable the profile. To disable the profile, clear the check box.

-
-
Click save to create. The profile entry displays "Pending." After the onboarding request is complete, the Identifier displays for the respective environment. The NPT Profile IDs are used during Provision Token and Provision Cryptogram requests in the NPT API (tokenization service).

Following is an example of Vantiv profile configuration settings.
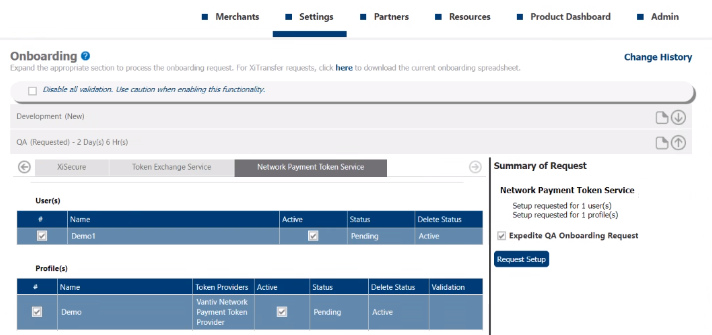
Submit NPT Onboarding Request
-
Once all configuration is done, go to Settings > Onboarding.
-
Select the Network Payment Token Service tab.
-
Select the check boxes for the user(s) to setup.
-
Select the check boxes for the profile(s) to setup.
-
Click Request Setup. Once the request is processed by the Onboarding Team, you can continue with the configuration and onboarding request.